Using UniFi G6 Entry with third-party smart locks (securely)
In December 2025, Ubiquiti released the G6 Entry, which finally brings a cleaner Access + Protect door experience. My goal was simple: keep my existing third-party smart lock setup (Nuki + Home Assistant), but unlock the door from G6 Entry using Touch Pass events (Home Key card in Apple Wallet).
I originally assumed I could send UniFi webhook events directly to Home Assistant and call lock.open. That approach works, but for a physical lock it was not a trust boundary I was comfortable with.
This is the final setup I actually use now: UniFi Access webhook -> self-hosted verifier service -> authenticated Home Assistant script call.
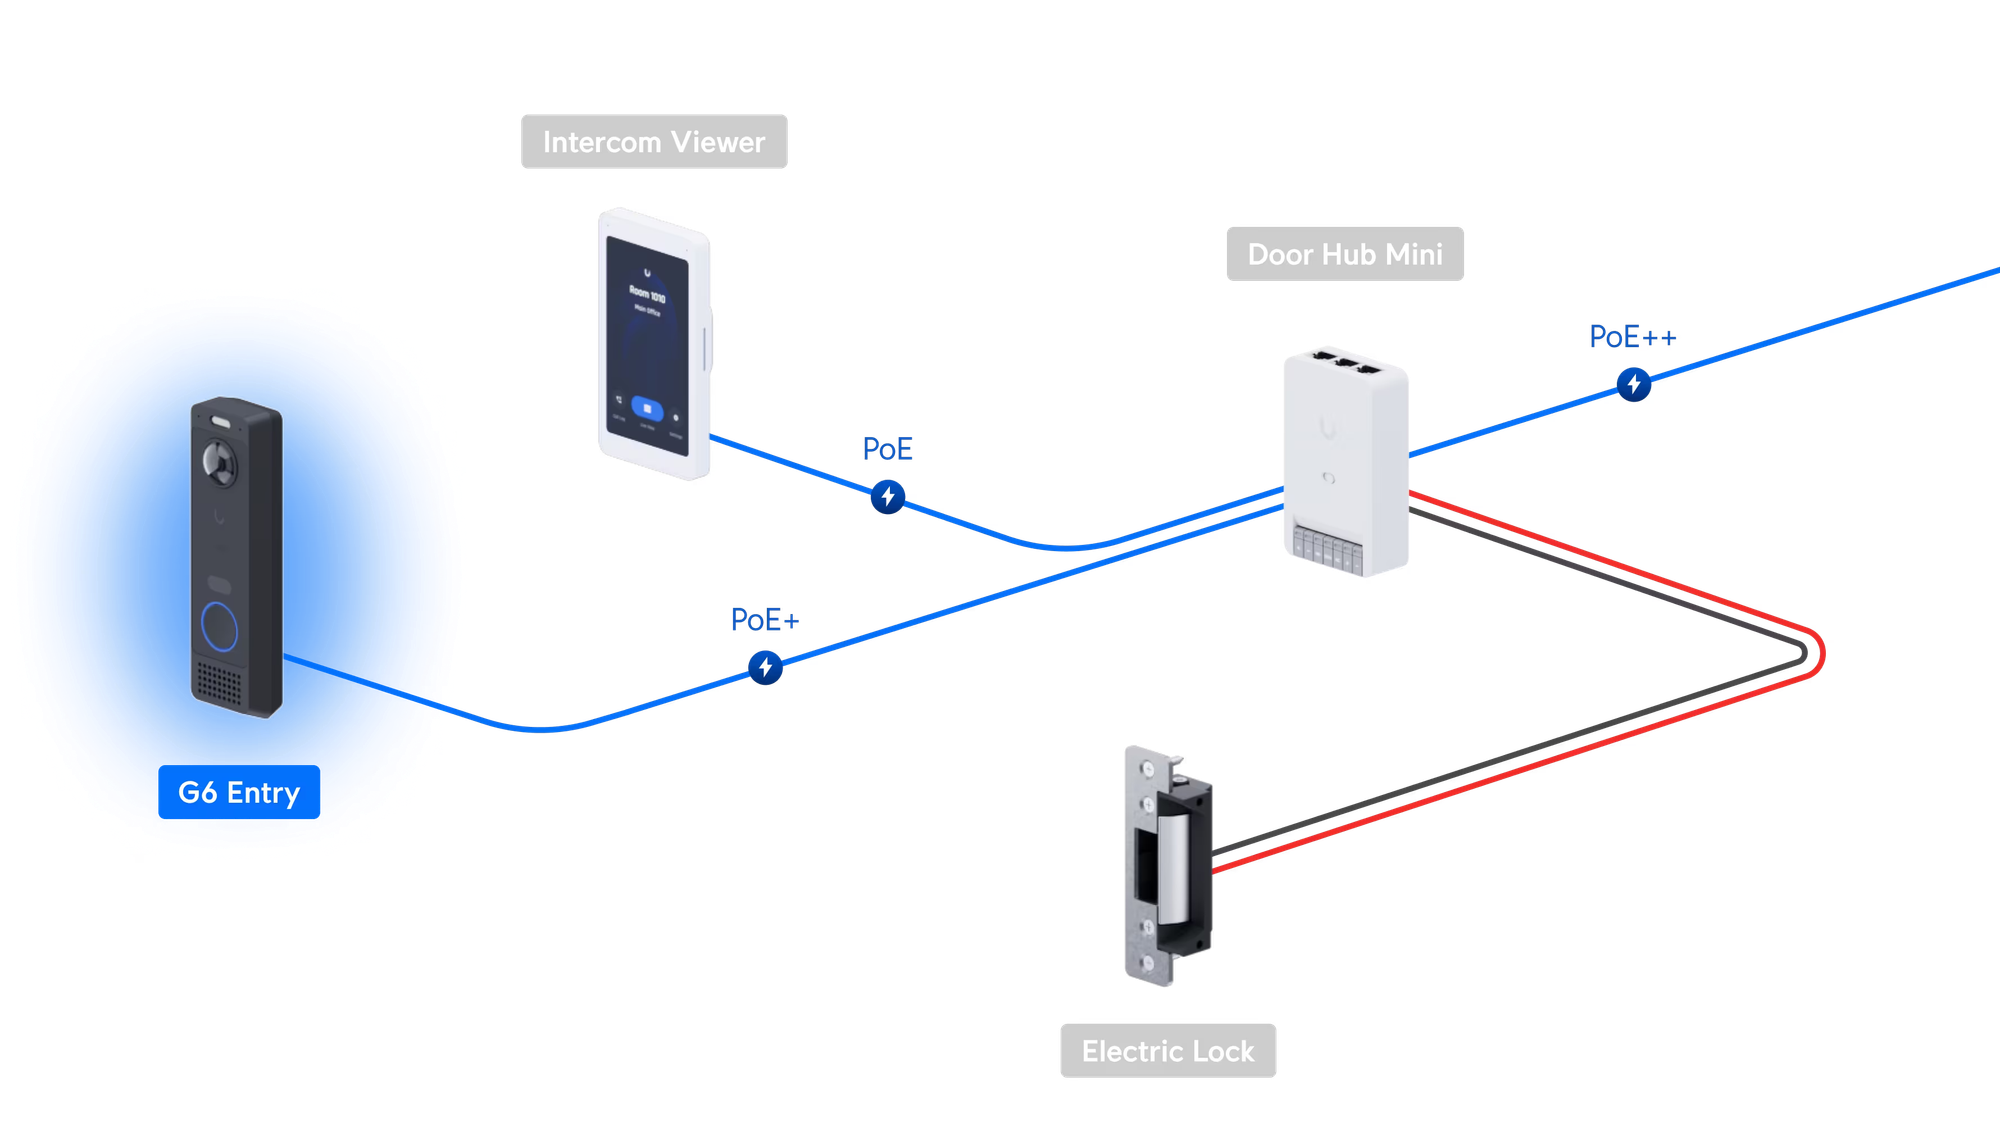
Important context: Access Hub is required
If you want access.door.unlock webhook events from UniFi Access, you still need an Access Hub in the topology.
Even if your final lock actuation is done by a third-party smart lock and not an electric strike wired to the hub, the hub is still a hard requirement for this event pipeline. For my use case, an Access Hub Mini was sufficient.
The other catch: webhook management is API-first
For this integration, the key webhook endpoint operations are done through the UniFi Access API. The GUI workflow is still limited for this exact use case.
So you should expect to use API calls for creating webhook endpoints, selecting events, and retrieving the generated webhook secret.
Why not use a direct Home Assistant webhook?
A direct Home Assistant webhook unlock flow usually depends on:
- a secret webhook URL
- JSON payload checks in templates
That was my first experiment. But it does not cryptographically verify sender authenticity in the way UniFi webhook signing allows.
For a lock, I wanted all of this before triggering an unlock:
- signature verification
- timestamp/clock-skew checks
- replay protection
- strict allowlists (policy, actor, location, device, auth type)
Architecture
- UniFi Access emits
access.door.unlock. - Go verifier validates the
Signatureheader (HMAC-SHA256 with UniFi webhook secret). - Verifier enforces allowlists and replay/age checks.
- Verifier calls Home Assistant REST API with a dedicated token.
- Home Assistant runs a dedicated script that performs
lock.open.
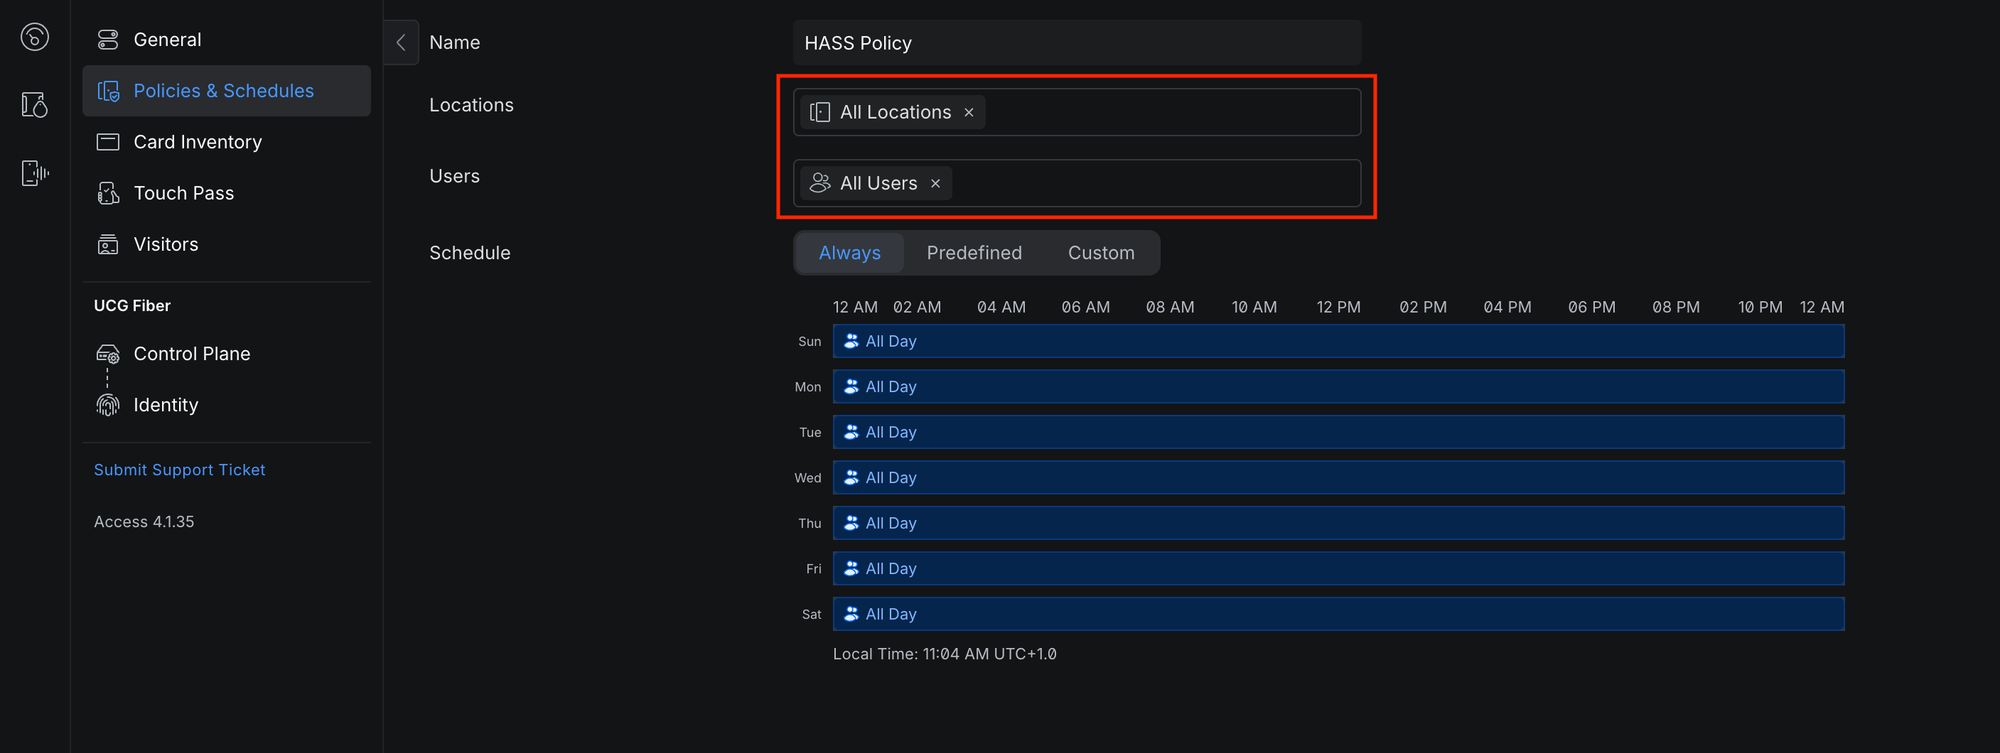
Step 1: Create an Access policy
Create a dedicated policy for this automation path so the event can be filtered cleanly in downstream checks.
At minimum:
- assign the correct location (door/hub pair)
- assign only users that should be able to trigger this automation
Step 2: Create a UniFi Access API token
In UniFi Access settings, create an API token and keep it secure.

Step 3: Retrieve your policy ID via API
You will need the policy ID to enforce allowlist checks in the verifier.
$ curl -sk "https://<unifi-console-ip>:12445/api/v1/developer/access_policies" \
  -H "Authorization: Bearer ${UNIFI_ACCESS_API_KEY}" \
  -H "Accept: application/json" | jq
Find your policy and copy its id.
Step 4: Create webhook endpoint via API (not GUI)
Create a webhook endpoint subscribed to access.door.unlock:
$ curl -sk -X POST "https://<unifi-console-ip>:12445/api/v1/developer/webhooks/endpoints" \
  -H "Authorization: Bearer ${UNIFI_ACCESS_API_KEY}" \
  -H "Accept: application/json" \
  -H "Content-Type: application/json" \
  -d '{
    "name": "Apartment Door Unlock",
    "events": ["access.door.unlock"],
    "endpoint": "https://<verifier-host>/unifi/webhook"
  }' | jq
Important: save the returned webhook secret. The verifier uses it to validate webhook signatures.
Step 5: Deploy the verifier service
I put together a compact verifier service that performs the checks mentioned above and deployed it using Docker. The code is available at majd/unifi-hass-webhook.
If you'd like to use the code I linked above, clone the code from the GitHub repository and create a .env file. Below are example values.
LISTEN_ADDRESS=:8000

UNIFI_WEBHOOK_SECRET=replace_me
UNIFI_ALLOWED_POLICY_IDS=<policy-id-from-step-3> # Policy IDs from your Access deployment (comma seperated)
UNIFI_ALLOWED_ACTOR_IDS=<actor-id-1>,<actor-id-2> # User IDs from your Access deployment (comma seperated)
UNIFI_ALLOWED_DEVICE_IDS=<device-id> # Access Hub IDs from your Access deployment (comma seperated)
UNIFI_ALLOWED_LOCATION_IDS=<location-id> # location IDs from your Access deployment (comma seperated)
UNIFI_ALLOWED_AUTH_TYPES=WALLET_NFC_APPLE # Allowed auth types. WALLET_NFC_APPLE is Touch Pass in Apple Wallet (comma seperated)

HA_BASE_URL=https://home-assistant.example.com
HA_TOKEN=replace_me
HA_SCRIPT_ENTITY_ID=script.retract_apartment_door_latch
Run:
$ docker compose build
$ docker compose up -d
Step 6: Create a dedicated Home Assistant script
Instead of unlocking directly from an exposed webhook trigger, expose a script target and call it through authenticated API from the verifier.
script:
  retract_apartment_door_latch:
    alias: Retract Apartment Door Latch
    mode: single
    sequence:
      - service: lock.open
        target:
          entity_id: lock.apartment_door_lock
What the verifier validates before unlock
- Signature: validates UniFi
Signatureheader with webhook secret - Event type: only
access.door.unlock - Result: access must be granted
- Allowlists: policy, actor, device, location, auth type
- Clock skew: stale/future event rejection
- Replay: repeated event suppression
Final thoughts
A direct Home Assistant webhook unlock is tempting because it is quick. For a lock though, the additional verification layer is worth the complexity. The verifier service is small, containerized, and gives stronger guarantees with minimal operational overhead.
If you are wiring physical access control into automation, I strongly recommend this pattern over a direct webhook unlock.